This beginner sewing guide explores how sewing is often mistaken for a simple act of “pushing fabric through a needle.” However, in professional studios, it is understood as a rigorous exercise in engineering. When you transition from hand-sewing to true garment construction, this beginner sewing guide will help you stop just “making” and start “building”. To achieve that clean, high-end finish you must master the fundamental mechanics of the stitch before tackling complex patterns.
When you first start your sewing journey, looking at a machine with its array of knobs, levers, and miles of thread can feel less like a fun hobby and more like trying to pilot a small aircraft. I’ve been exactly where you are. When I started, I spent hours trying to rethread my needle, only to realize I used to thread it from the wrong side. I almost gave up before I’d even made a single stitch.
But everything changed once I learned the “invisible laws” of how fabric behaves under tension and moves along the grain. We’re in this together, part of a community of makers who value the intentional craft of building something with our own hands. Let’s start this beginner sewing guide with principles that you might need to avoid the most frustrating mistakes.
Mastering the “Invisible” Rule: Seam Allowance
If there is one thing, I’ve learned from years of teaching workshops and drafting patterns, it’s that accuracy is your superpower. The most common mistake beginners make isn’t a crooked line; it’s ignoring the seam allowance.
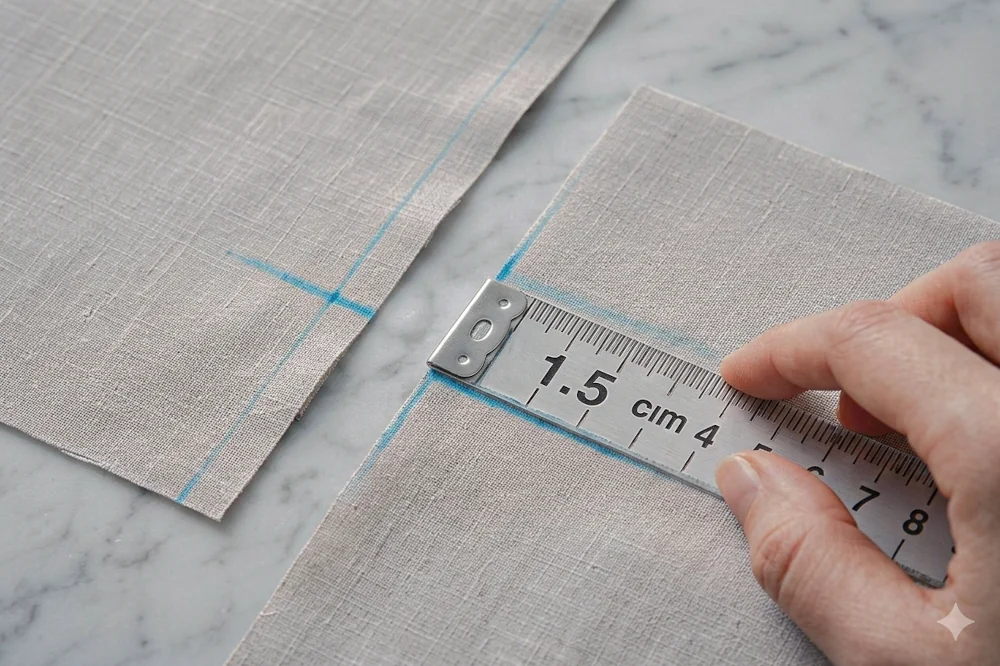
The seam allowance is the distance between the edge of the fabric and the line of stitching. Most patterns use a standard of 1.5 cm. While this may seem like a small detail, it is the structural foundation of your garment. If you “eyeball” it and drift even half a centimeter off on every seam, those errors compound. By the time you reach the final zipper, your garment could be even 5 cm too small to wear.
Understanding this, is what separates a homemade project from a professionally built garment. It provides the necessary space for finishing your edges, like zigzagging or overlocking, to prevent fraying over time. It also gives you a tiny bit of “insurance” if you need to let a garment out slightly for a better fit. When you respect the seam allowance, you ensure that every notch, curve, and corner aligns exactly as the designer intended.
Tip: Don’t rely on your eyes alone. Use a piece of colorful chalk or marker to mark your seam allowance properly. It gives you a clear “wall” to guide your fabric against, ensuring every piece fits perfectly and your construction remains mathematically sound.
The Blueprint: Three Basic Seams to Know
A Beginner Sewing Guide to Joining Fabric
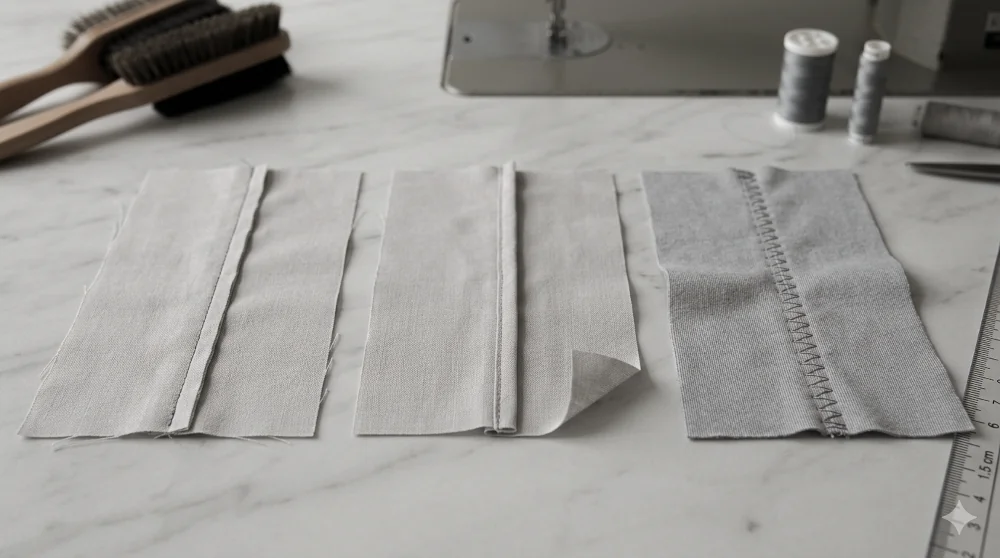
- The Plain Seam: The bread and butter of construction used to join two pieces of fabric with right sides together.
- The French Seam: A “seam within a seam” that encases raw edges. It’s the hallmark of high-end luxury garments, providing a clean, durable finish on the inside without the need for an overlock machine.
- The Zig-Zag Seam: This isn’t just for decoration; it is vital for stretchy fabrics, allowing the thread to move with the garment rather than snapping under tension.
Before you can build a wardrobe, you need to master the joints that hold it together. Think of these as the fundamental “welds” of garment engineering; without a strong foundation here, the rest of your architecture will crumble the moment it’s put to the test.
Tip: There is no need to have an expensive overlock machine to finish your edges, so they don’t fray. Use a zig-zag stitch so your garment has nice finishing edges.
Common Frustrations: How to Outsmart Your Machine
1. Skipped Stitches
If your machine is skipping stitches or making a weird sound, your needle is likely dull or the wrong type.
Personal Rule: I change my needle every few projects if they do not take more than 2-3 hours. Think of it like a chef sharpening their knife—you can’t do good work with a blunt tool.
Tip: Always verify the needle type for your specific fabric. If you are moving to a heavy denim or canvas, you must switch to a thicker, reinforced needle to maintain structural integrity.
2. Why the Thread Keeps Slipping Out?
One of the most maddening frustrations for a beginner is sitting down to sew, pressing the pedal, and having the needle come unthreaded instantly. This usually happens because the “take-up lever” was in the wrong position or you didn’t leave enough of a “tail”.
The Fix: Always turn the handwheel toward you until the needle and the take-up lever are at their highest point before you start.
Threading Direction: Ensure you are threading the needle from the correct side—usually front to back on modern machines.
The Tail Method: Before you take your first stitch, pull about 10 cm to 15 cm of both the top and bobbin threads to the back and left of the machine.
Initial Tension: Holding these “tails” firmly for the first two or three stitches provides the necessary tension to keep the needle threaded and prevents the fabric from getting “eaten” by the machine.
3. The “Bird’s Nest” – Tangled Thread Underneath
You start sewing, and suddenly there’s a massive knot of thread on the bottom of your fabric. There is nothing more frustrating than a tangled ‘bird’s nest’ of thread, but once you master the tension rules in this beginner sewing guide, you’ll spend your time creating rather than unpicking.
The Reality: The top thread isn’t seated in the tension discs.
The Fix: Always re-thread the top of the machine with the presser foot in the up position. This opens the tension discs so the thread can sit deeply inside them.
Conclusion: Just Start
The biggest hurdle isn’t the technical skill, it’s the fear of messing up. You will sew a sleeve on inside out at some point. You will have to unpick a messy seam. That’s not failure, that’s how you learn the machine. Remember, every expert was once a beginner sitting exactly where
Ready to get started?
Before you sit down to sew, make sure you have the right tools for the job! Check out my companion guide: 5 Essential Tools for a Beginner’s Sewing Kit to ensure you aren’t wasting money on gadgets you’ll never use.